
How to Make a Digital Bouquet, Step by Step
A few favorite flowers, a memory, and something you’ve been meaning to say. Here’s how to turn them into a gift someone can open on their screen.
You don’t need an account or drawing experience. Start with a ready-made arrangement or build one flower by flower, then add a personal note and send the finished bouquet with a link.
We’ll make “A little sunshine for you” for Alex, from Mia, using the Pastel wishes bouquet. The pictures below come from the actual editor, so you can follow along with the same tools.
Try this bouquet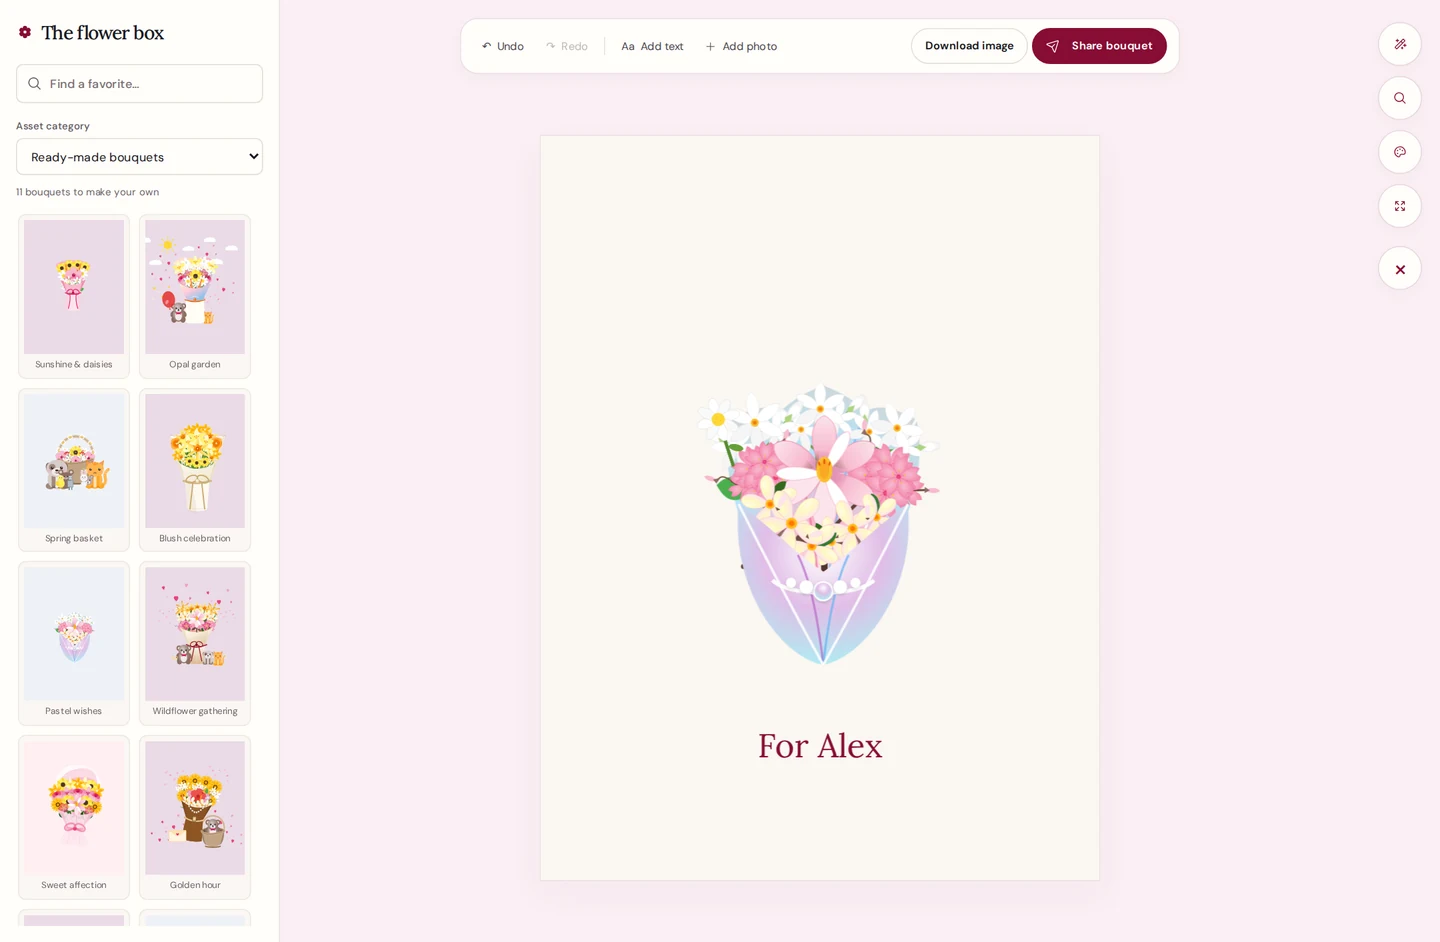
1. Choose your starting point
Open Create. On a larger screen, the Flower box sits on the left, your canvas is in the middle, and the small tool buttons are on the right. The top toolbar holds Undo, Redo, Add text, Add photo, Download image and Share bouquet.
For a head start, leave Asset category set to Ready-made bouquets and select an arrangement. We use Pastel wishes, a soft pink and white bouquet in a lavender wrap. Every flower remains editable; the template is your starting point, not a finished image you’re stuck with.
Prefer to build your own? Begin with the empty canvas and switch the category to Flowers. If you already have an arrangement, choosing another template asks you to confirm replacement. Your note stays, and Undo can recover the previous arrangement.
Need a little inspiration first? Browse User Case to see finished gifts. Return to Create when you’re ready to make your own.
2. Find your flowers
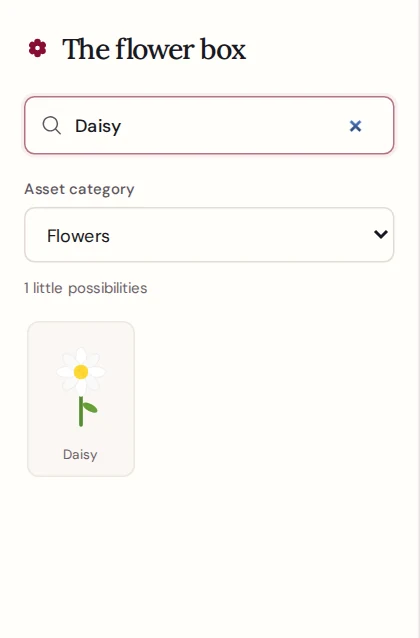
In the Flower box, change Asset category to Flowers. Type a name into the search field to narrow the current category. For this example, search for Daisy and select its card to add one to the canvas.
Switch to Wraps & baskets for a container, Greenery & fillers to soften the edges, or Little extras for a finishing detail. Clear the search when you want to see the whole category again.
The material grid scrolls independently, and the Flower box stays open while you work. A simple place to begin is one main flower, a few supporting blooms and a wrap. Repeating a small color palette helps the arrangement feel connected.
3. Arrange the bouquet
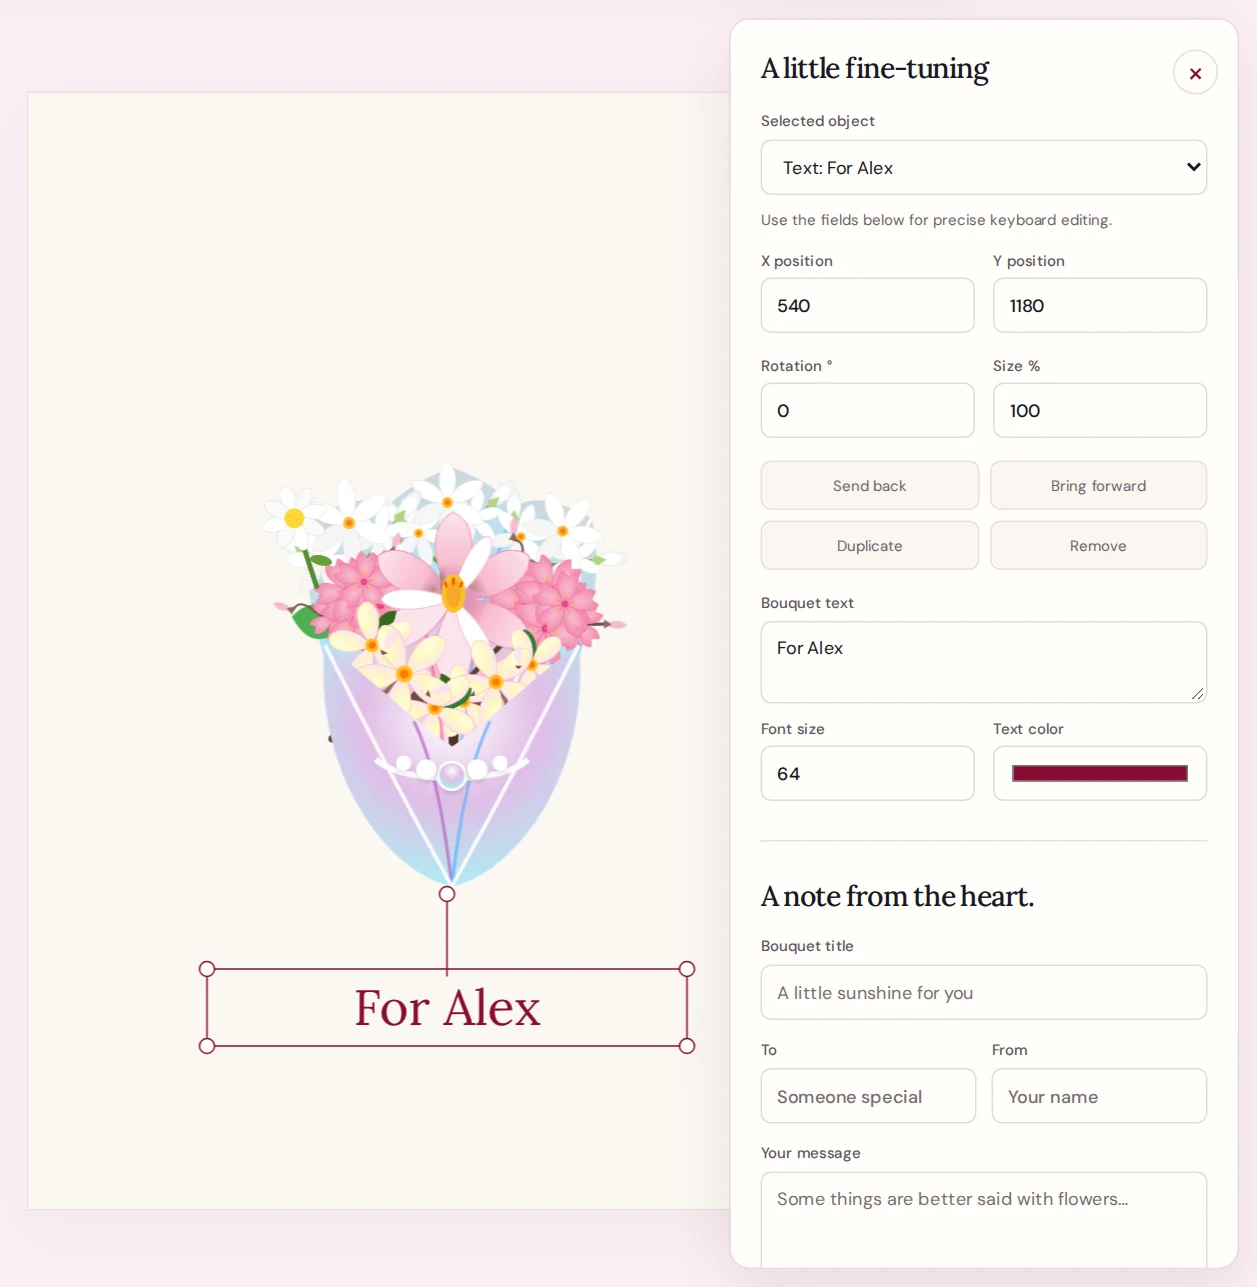
Drag a flower into place, then select it on the canvas to open its editing controls. After adding a material from the Flower box, you can also open Edit & note with the wand button on the right. Use Selected object to pick an item that is difficult to reach behind another flower.
- X position and Y position move the selected item precisely.
- Rotation ° changes its angle; Size % makes it smaller or larger.
- Send back and Bring forward change which items overlap.
- Duplicate repeats an item; Remove takes it out of the arrangement.
Try tilting supporting flowers slightly away from the center. Leave a little breathing room around the outside so the shape of the bouquet is easy to see. In our example, an extra Daisy sits toward the left of the existing blooms.
Experiment freely with Undo and Redo. Their keyboard shortcuts are Ctrl/⌘ Z and Ctrl/⌘ Shift Z. To move a selected object with the keyboard, focus the canvas and use the arrow keys; keep focus out of a text field when using editor shortcuts.
4. Make it personal
Add a small greeting
Select Add text in the top toolbar. The text editor opens so you can replace “Just for you” with a name or short greeting. We wrote For Alex, kept the burgundy color and placed it beneath the flowers. Adjust Font size, Text color and position in the editing panel.
This text becomes part of the bouquet image. Save your longer message for the separate letter in the next step.
Include a photo
Select Add photo and choose a PNG, JPEG or WebP image under 10 MB from your device. Once it appears on the canvas, move and size it with the same editing controls. A shared memory, a pet or a favorite place can make the gift feel especially personal. Your photo stays in this browser while you create; when you share, the finished bouquet image includes it.
Choose a background
Open the Background palette button and choose a swatch. Warm cream gives our example a gentle backdrop. Soft pink, Sage green, Powder blue, White and Lavender are also available. Pick a color that lets the flowers and your greeting stand out.
Creating on your phone
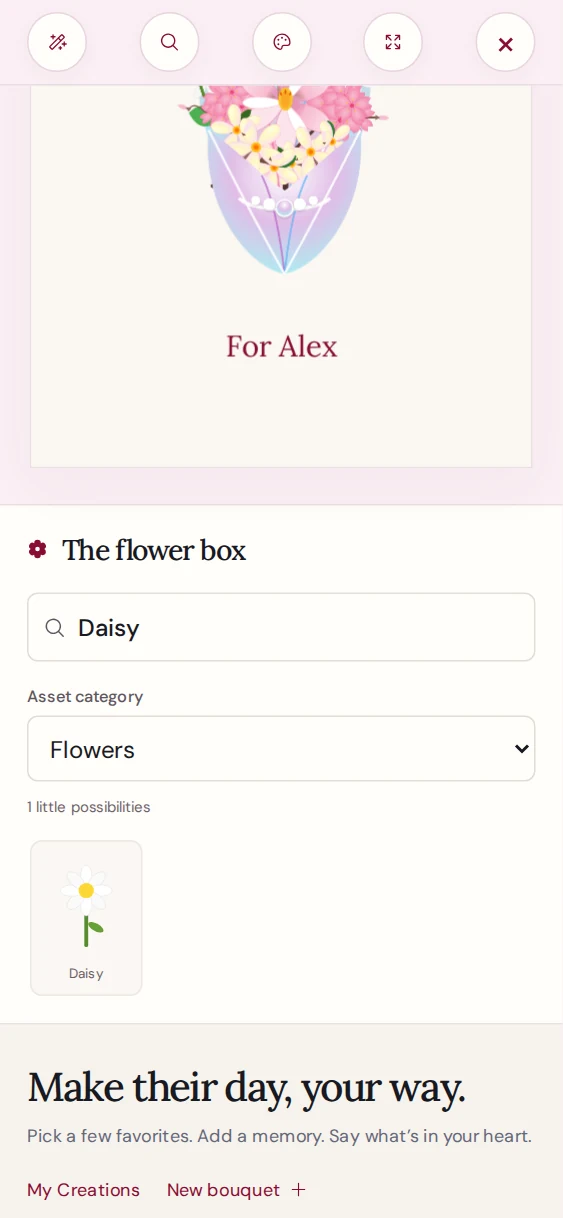
The canvas uses the available width, and the Flower box sits beneath it. Scroll down to browse materials, or use the magnifying-glass tool to jump to search. Swipe within the material grid to reach more choices.
The compact tool row keeps editing, search, background, fullscreen and Clear within reach. If you use Clear, the editor asks before replacing the arrangement; it keeps your note and supports Undo.
5. Write a note and choose paper
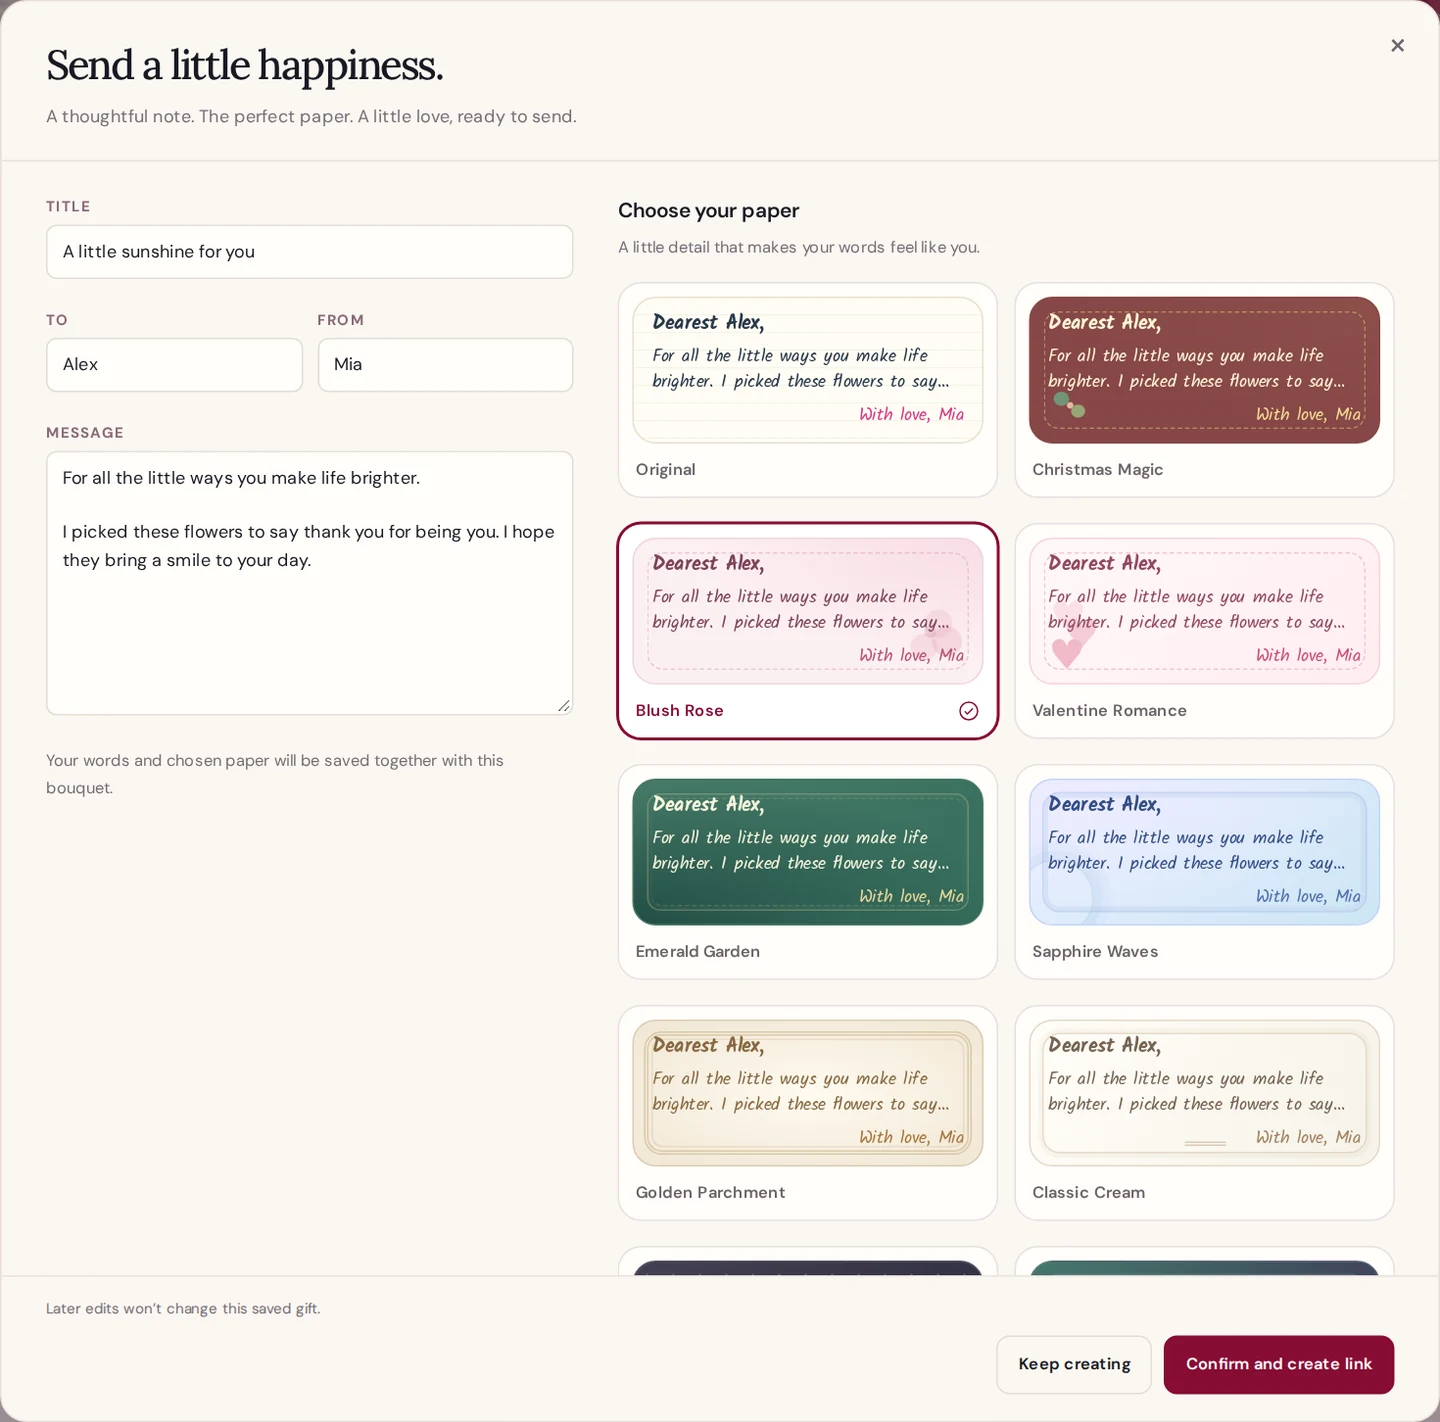
Open Edit & note and find “A note from the heart.” Enter a Bouquet title, the recipient’s name in To, your name in From, and Your message. The note preview shows how your words will look. You can choose a Note card here, or compare the larger paper previews when you share.
A good note can be simple: name something you appreciate, add one specific memory and finish with a wish for their day. Here is the message in our example:
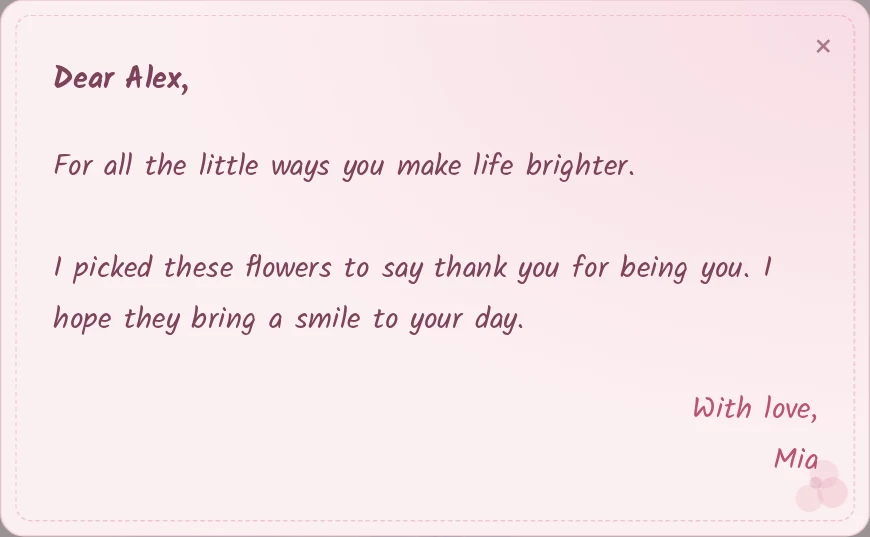
For all the little ways you make life brighter.
I picked these flowers to say thank you for being you. I hope they bring a smile to your day.
The paper adds a greeting and a signature from the To and From fields. You don’t need to repeat them in your message unless you want a different personal sign-off.
Select Share bouquet to open the review. You can still edit all four fields and choose from ten papers, including Original, Blush Rose, Emerald Garden, Golden Parchment and Midnight. We chose Blush Rose to match the pink flowers. Choose Keep creating if you want to return without applying the review changes.
6. Download or share your gift
Keep an image
Use Download image to save the artwork at 1080 × 1440 pixels. This includes flowers, photos and text on the canvas. The separate letter and opening experience belong to the shared gift, so use a gift link when you want someone to receive those too.
Create the gift link
- Make sure the canvas has at least one item, then select Share bouquet.
- Check the title, To, From, message and paper. All four text fields are required for sharing.
- Select Confirm and create link and wait for “Your bouquet is ready.”
- Use Copy link and paste it into your message. You can also download the QR code, or use Share when your browser supports it.
Use Open your gift to check the experience before sending the link. Anyone who has that link can open the gift, so choose names, photos and words you’re comfortable sharing with its recipients.
Each confirmed share saves that version of the bouquet and letter. Later edits to your draft won’t change it. To send an updated version, share again and use the new link. If publishing fails, your draft remains available; you can retry or download the image.
7. See what they will receive
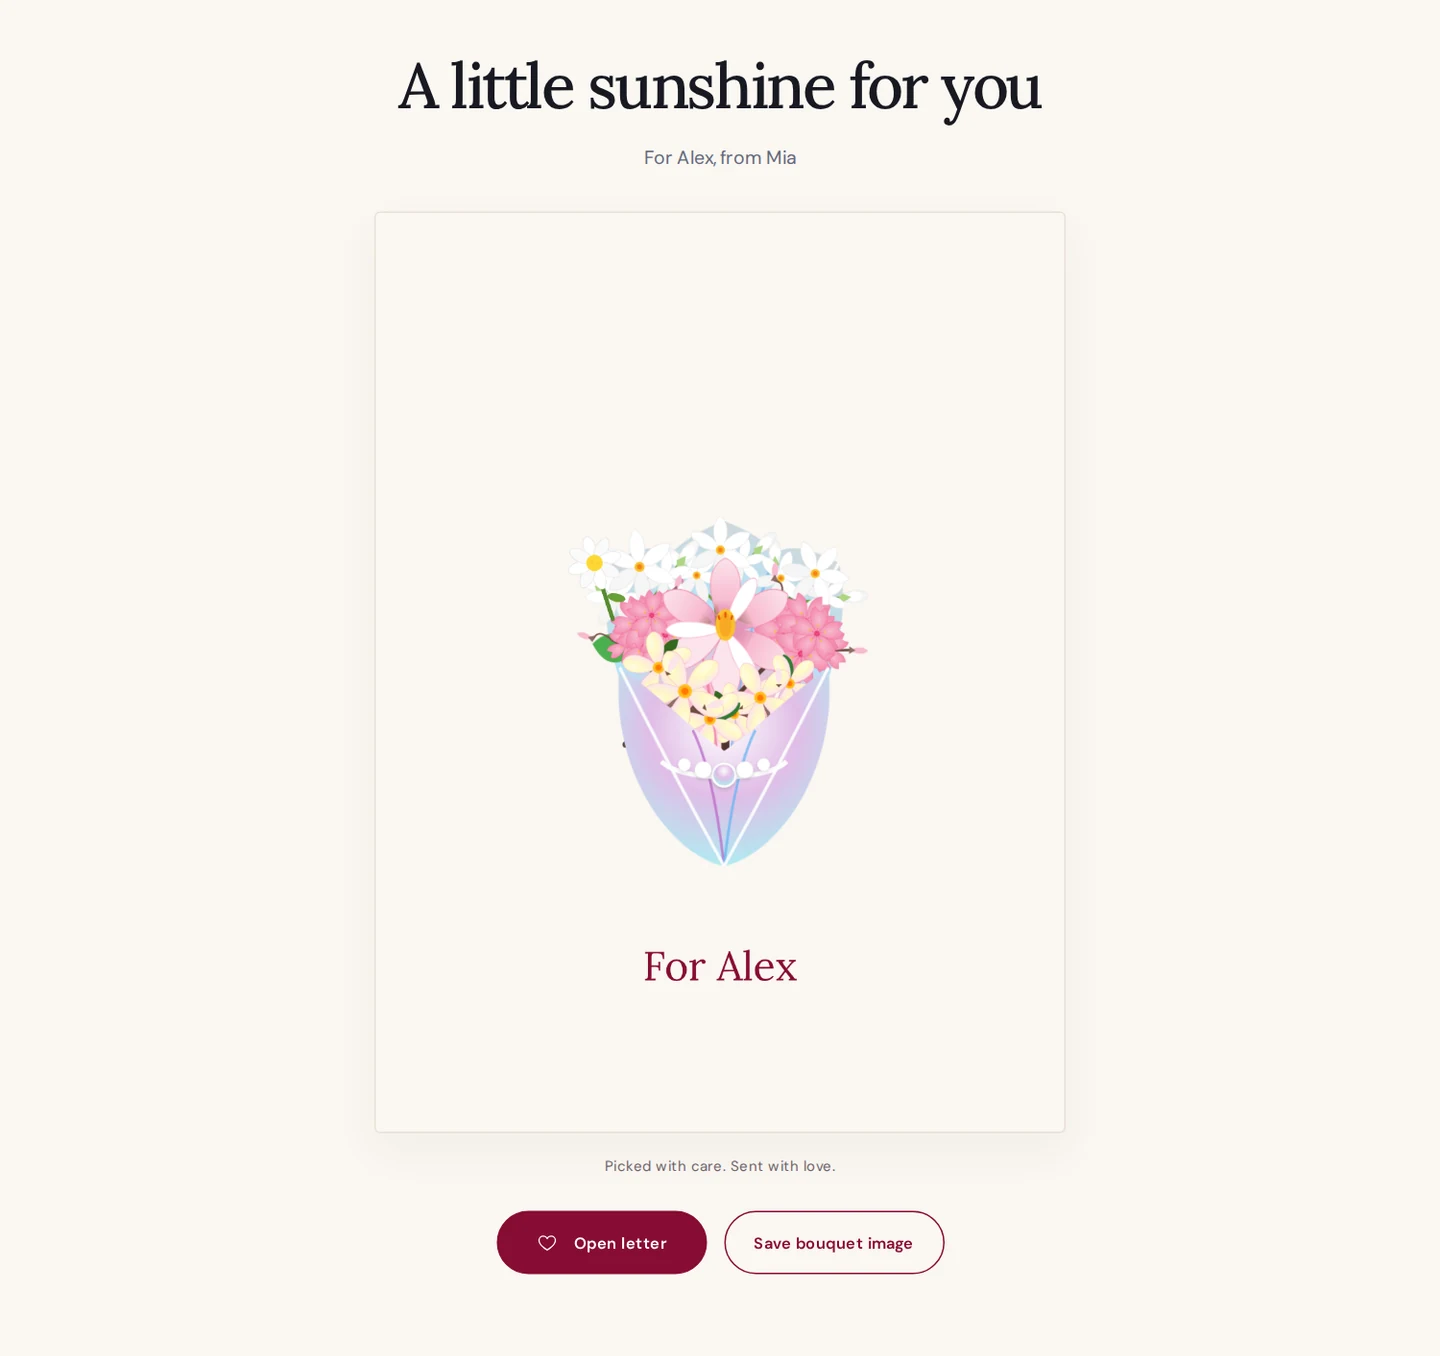
Your recipient opens an invitation and selects Open your bouquet. The flowers come into view, followed by the letter on your chosen paper. After they finish reading and close the letter, they reach the full gift page.
From there, Open letter brings the note back, and Save bouquet image downloads the artwork. They don’t need access to your browser or editable draft. Visitors who prefer reduced motion get a shorter opening experience.
8. Pick up where you left off
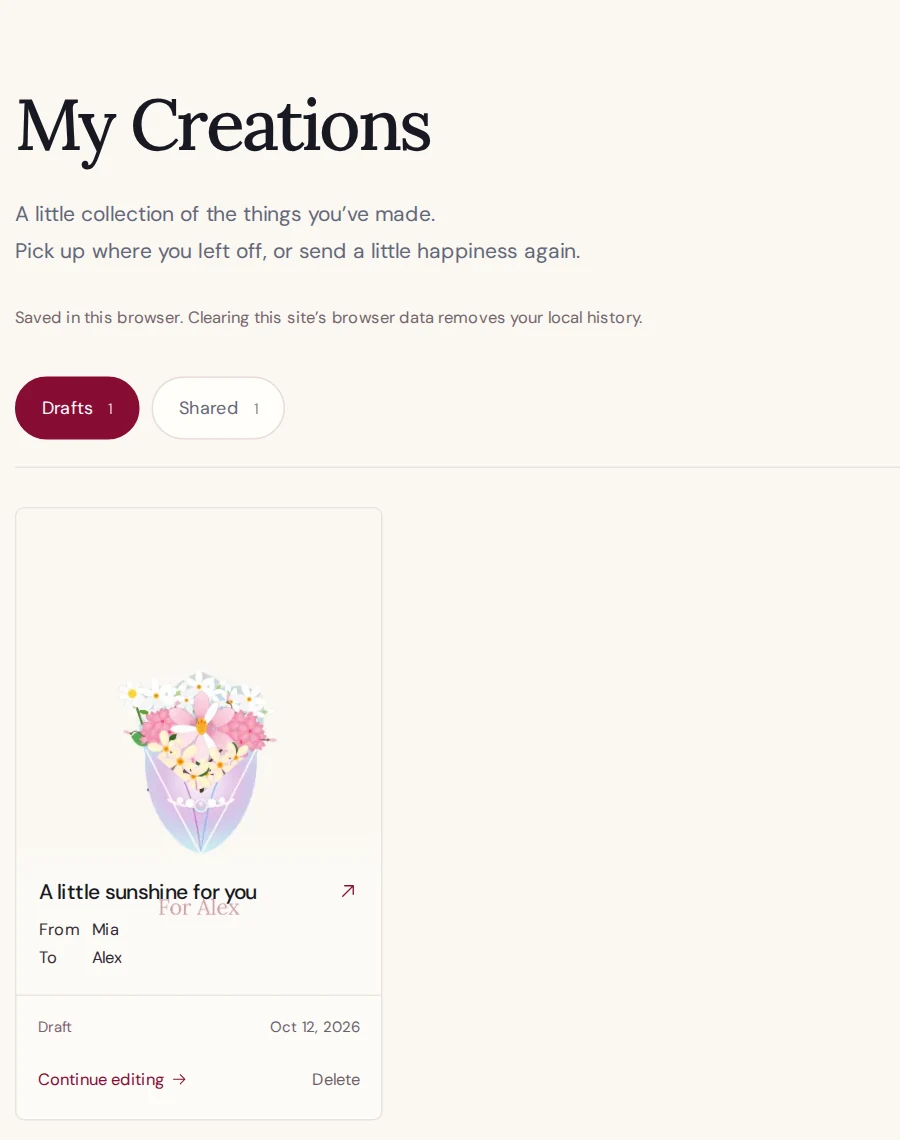
Your work saves automatically in this browser as you create. Look for All saved in this browser beneath the workspace before leaving. If a save error appears, use the available recovery action rather than assuming your latest changes are stored.
Open My Creations from the Header. In Drafts, choose Continue editing on the bouquet you want to resume. Its flowers, photos, text and note return together. New bouquet starts a separate creation.
The Shared tab keeps links to gifts you have successfully shared from this browser. It is useful when you want to copy a link again. Removing a local history entry does not delete the published gift.
Drafts and this history are local to the browser and device you used. They don’t sync to another browser, and clearing site data or ending a private browsing session can remove them. Keep a downloaded image and save important gift links separately.
A few useful answers
Can I make a bouquet without signing up?
Yes. You can create, download and share without an account. Your editable work is saved in the browser you use.
Why can’t I see my flowers in search?
Search applies to the selected category. Switch to Flowers when searching for a flower name, or clear the field to browse everything in that category.
Can I edit a bouquet after sending it?
You can continue editing its draft, but the gift you already sent stays as it was. Confirm another share to create a new link for the updated version.
Will the link last forever?
Published gifts have no automatic expiry while retained in storage, but permanent hosting is not guaranteed. Download the artwork if you want a copy to keep. Our privacy page explains what stays in your browser and what is saved when you share.
A little thought goes a long way.
Choose a few flowers that feel like them. Add words that sound like you. That’s what makes the gift yours.
Create your bouquet